Almost all kinds of chopped cookies are always a favorite food of many children and even adults, especially when they are also treated in small parties. However, the way to make decorated cookies with royalty requires care to create a basic drop cookie.
They are cut in cute or classic shapes, with some very interesting textures painted on top. How to make decorated cookies with royalty does not need to be too complicated.
Below we have listed some simple techniques that will help you create professional looking cookies. You might think royal cookies are complicated, but it's actually very simple to do. The step-by-step processes to make it happen are all used by us through the formula.
Similar to ice creams, the maker can change the consistency with the amount of water or sugar added. Besides, also depending on the style of decoration you want to aim for, this will give different consistency.
With a basic or submerged coat, you'll definitely want the icing on top of the cookie to be a bit thinner.
As for tubular designs, you should use a little less water or more sugar to create a thicker layer of ice.
Whatever your idea, measuring quantity is important.
2. The supplies for making decorated cookies with royal
Before you start decorating, you need to stock up on a few basic supplies for cookies with royal.
A shallow dish
Food coloring: usually for royal dyeing, you need to choose gel dye because it can create saturated colors, avoid not thinning the stone layer.
Toothpicks
Decorate squeeze bottles: as they are quite manageable than piping bags, ideal for children.
3. Method for making decorated cookies with royal
Method 1: Embedding
This is the simplest way to decorate cookies with royalty. This method is also great for all kinds of decorations. You just need to prepare a thin layer of royal ice cream, then place it in a shallow bowl, then dip the top of the cut cookies in the cold cream. At this point, you can confidently set the cake aside and let it dry naturally or continue decorating while it's still wet.
Method 2: Dip and swirl
It's also a super easy way to decorate, try the wet-on-wet method, which essentially creates more ice than freezing with a wet finish. When you do, you need to get a piping bag or decorative bottle filled with thin colored tape. In addition, you have also faded the overlay in a curvy, wavy pattern as well. Next, take a toothpick and swirl the layers of colored and white stones together to create a marble effect.
Also, you should use the same technique to create swirls and herringbone patterns. Especially with swirls, just plug in the dots and thread a toothpick through it.
On the other hand, you can create a heart shape this way or design a spiral as you like. As for herringbone, draw straight lines with mist and toothpicks slanted through those lines in a perpendicular direction.
Method 3: Design of pipelines
This is a complicated design on cookies, as you can create those with some of the same tools.
Let the base of the cake dry completely and do not close the cake while the base is still wet
You can use a layer of hard royal cream, need a little extra sugar for the confectionery, and you can design any style in piping bags or decorative squeeze bottles.
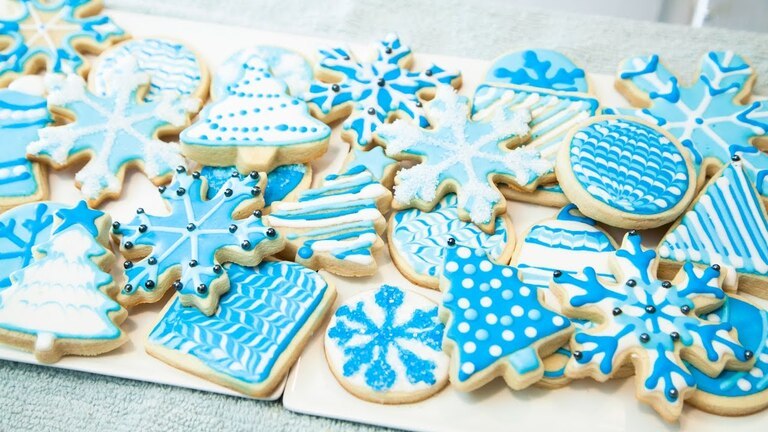
The color matching on the top of the cake is also important, here you can use white on the background which is very suitable for winter as you can easily create flowers, dots or some other pattern.
However, feel free to experiment with the design on a piece of parchment to make the ice melt, when you want to decorate the actual cookie.
4. Some ways to make decorated cookies with royal
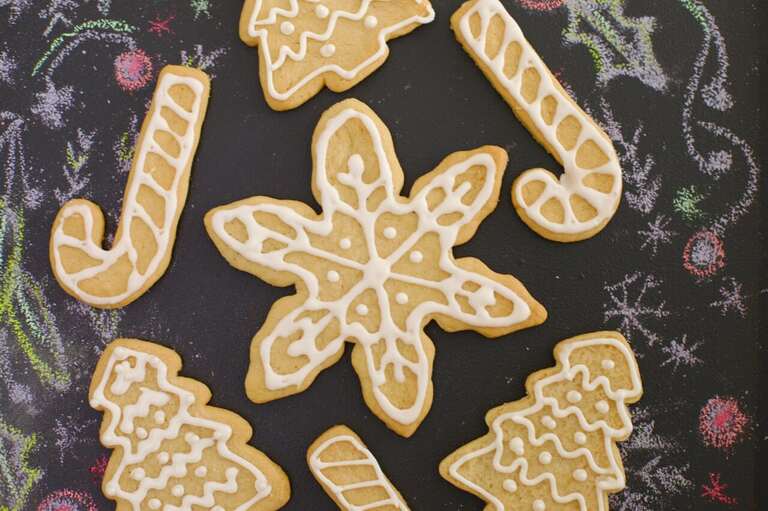
Piping
This is a basic technique used in conjunction with flooding, plus you can create contours and some intricate patterns, using the piping technique. You need to opt for a small round tip if you want to do detailed work.
However, you need to consider creating templates and sketches and drawings when using pipelines. Some points like a checkerboard, concentric circles or shapes, even simple drawings on a cookie.
Flooding
How to cover larger areas of cookies by freezing. You simply contour with icing, then fill the area with a slightly thinner icing. The border acts as a barrier to keep the layer of sugar from flowing out.
Besides, you can also divide and flood the same color to create a uniform color area. This helps create a watercolor effect from the edge of the cake to the center of the cake.
On the other hand, you should consider attaching a pattern like a checkerboard or diamond to the cookie, it is recommended to use a flooding freeze to fill in every other square for easy certainty.
Bleeding
Here's how you'll put an extra layer of colored tape on top of the wet spot. Instead of you going to create a clean line, the colors will blend together and look more organic.
The use of bleeding to create beautiful effects. Place and flood the surface with one color, then place another color on the spot immediately.
If you want to draw a colored line, you can use a toothpick to drag the color back and forth to create an easy V shape.
On the other hand, if you are placing the dots on a wet flooded area, you should use a toothpick to pull the toothpick through the icing dot in one direction.
Placing different colors right next to each other creates a dramatic watercolor, marble or swirl effect. Draw diagonal lines by pulling a toothpick through the ice.
Flocking
The method of pouring sugar includes sprinkling sparkling sugar or granulated sugar over areas with frozen, flooded pipes. It will create a glittering line or pattern.
Simply place the cookies on a shallow baking pan or rimmed plate. Making a pattern on the cookies, continuing to sprinkle the sugar immediately all over the surface of the cookie. Need to freeze for a minute or two before lifting cookies and including shaking any liquid sugar.
At the same time, you can also move flooded locations by shaking the glitter line on top of the flooded area. If the icing is too thin, let the icing sugar top dry for 1-2 minutes before lifting the cake and shaking off the liquid sugar. But this depends on the thickness of the icing and the humidity in the kitchen. You should therefore test by lifting the cookie and tilting it.
We recommend choosing glitter lines, which have mostly larger crystals and are easier to create a more dramatic look. It comes in almost any color or you can use regular granulated sugar.
You can also use sprinkles that aren't pareils or jigsaw puzzles over the pipe icing and shake the sprinkles out.
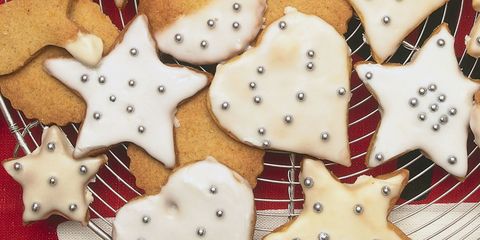
Adding candies, pearl balls, dragées
You can finally use tape to attach candies, pearls, and cupcakes by adding a dot of icing to the cookie, then placing the candy on top. You also want to use tweezers for this if the scissors or candies are small and thin. You simply sprinkle them over a flooded area while it is still wet.
Layering
This is a layering technique, you just need to let the cream dry between coats, at least for two hours under a gentle fan to make sure the top coat is completely dry before connecting the tube and adding another layer. .
At the same time, you can let the cake layer dry or overnight before decorating more.
Also, you can try a combination of completely coating a cookie shape in one color, letting it dry and adding a contrasting colored tubular garnish on top of the cake. Thanks to the line sparkles with pipes on a contrasting color background, this stands out even more.
5. Others way for making decorated cookies with royal
You can use crafting edible crayons to decorate the cookies. Simply sweep and flood a large area with white stone or pastel shades, then let dry completely.
Metallic dusts are also a quick way to decorate and are especially edible, and you can also mix a few drops of vodka and paint them over cookies for sparkle.
Edible gold or silver foil is a great accent when you want to decorate a cookie. You just need to wait for the ice to dry completely before adding the conifers to the cookies.
6. Store cookies
Once you've finished all the decorations on the cookie surface, it's important to let it dry completely before storing it in an airtight container. Or place them between sheets of parchment or wax paper. Also, store the cake at room temperature on the counter or kitchen table for up to five days.
Conclusion
Now you have enough information on how to make decorated cookies with royalty via our website. We very much hope that the above information will provide easy steps and suitable decoration.