When establishing a printer, it's important to select the greatest printer port you can and know how to choose the printer port correctly, specifically if you utilize your printer frequently. Your computer might only be enabled to use some printer ports, and each printer port offers a different speed. Additionally, some connectors allow for quicker printer setup and identification. For your printer, you should ideally aim for the fastest speed feasible.
The interface that chooses to print must be specified. Parallel and USB are the two common interfaces that go with your printer. You must identify the suitable printer port setting inside the printer driver in order to specify the interface.
What is a Printer port?
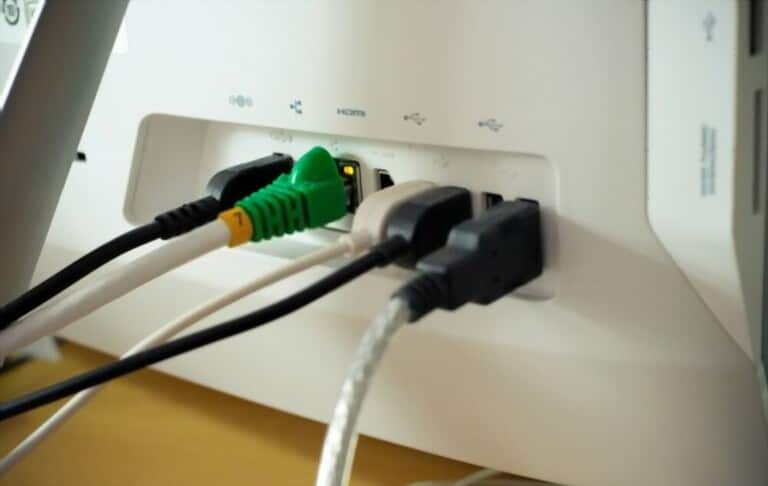
On the rear of a computer, there is a female connection or port called a printer port that enables communication with a printer. Users can send files and images to a printer using these ports.
A physical interface called a printer port, usually referred to simply a parallel port, connects external devices, like printers, to a main computer system. The universal serial bus, or USB, has essentially taken the role of the ports that were initially used to connect a variety of portable drives to computers. This connector served as the primary method of parallel data transfer to peripheral components prior to the development of USB devices.
Ports for hardware printers
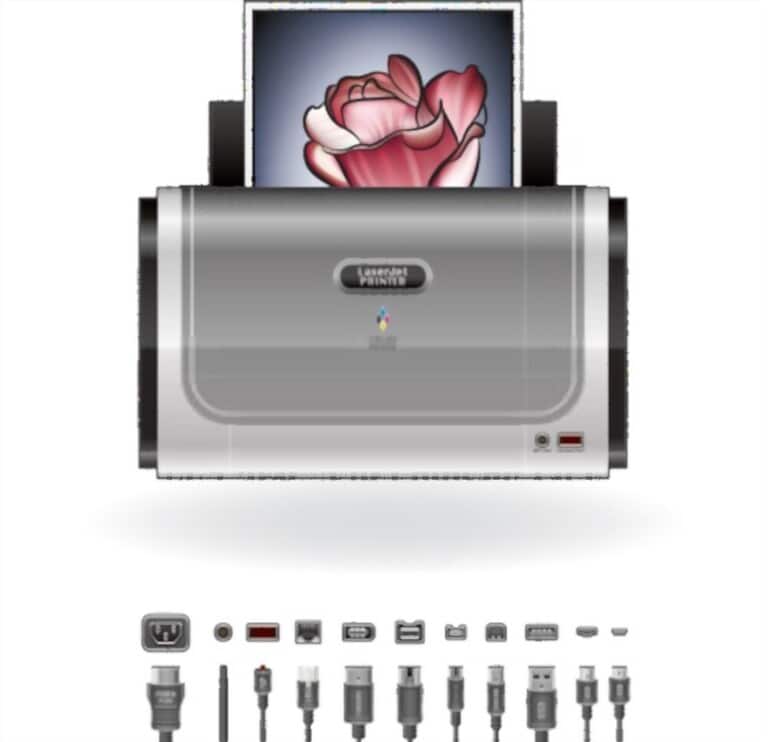
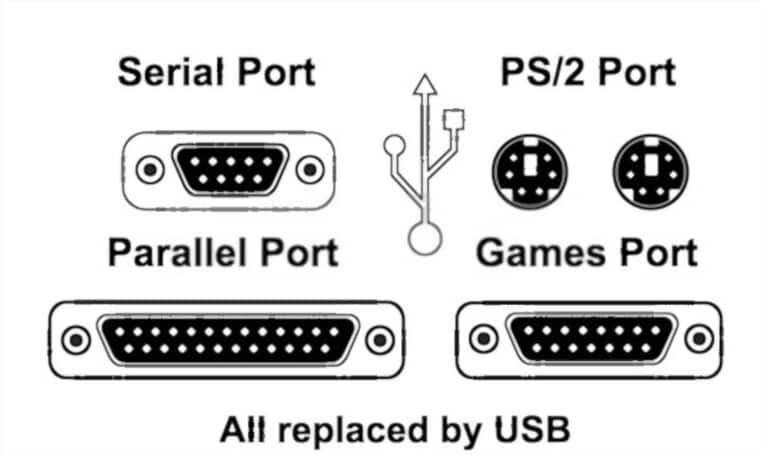
Hardware printer ports come in three main categories:
- Parallel port: A 25-pin connector with a Centronics port at one extremity that connects to a printer that is used for IEEE-1284 printer cables.
- SCSI port: A less frequent type of connector used with SCSI-compatible cables and printers.
- USB port: Most printers today use the newest connector.
Ports for software printers
There are additional software ports with a parallel printer. Ports LPT1, LPT2, LPT3, and LPT4 are among them. For further details on this kind of port, see our LPT specification.
How to choose Printer Port?
Parallel port
The parallel interface is supported by the Windows platform. The steps in the instructions below are really for Windows 98, but they apply to other Windows computers as well.
1. From the Start menu, select the Settings and then Printers.
2. Use the context menu that appears when you right-click on the EPSON EPL-5800 Advanced symbol to select Properties.
Step 3: Click the Details tab.
4. Select LPT1 by clicking the arrow adjacent to a Print to the next port drop-down list: (ECP Printer Port).
5. To save the setting, click OK.
USB port
You should physically connect a USB printer to the computer and electronically link it to Windows' first accessible Virtual Printer Port, either USB001 or USB002, in order to use a USB printer with your computer. Choose USB001 if that was one USB printer that are linking to your computer. Choose USB002 if there is an additional USB printer connected.
USB001
As the initial port Windows chooses when joining a printer using the computer program's Devices & Printers "Add a Printer" application, USB001 is the primary printer connection for USB printers. The utility's wizard will guide you through choosing a port, obtaining the correct driver for the printer, and printing a page as you install the printer. The printer is allocated to the USB001 port once the installation is finished and stays there until you decide to uninstall it, if necessary.
USB002
In the event that USB001 is currently in use by another USB printer, USB002 also functions as a virtual printer port. The port functions similarly to USB001 in that you can pick it for any USB printer and finish the installation process. After selecting USB002, Windows' Devices & Printers' "Add a Printer" software also guides you through the installation of your printer.
Additional USB Ports
If both USB001 & USB002 ports on your Windows PC are both in use, choose USB003, USB004, or another USBXXX Xport, where "XXX" stands for the USB port's individual number. If USB003 nor USB004 don't function, you might need to try other USB ports to determine which one will function with your printer. To finish the installation procedure, adhere to the onscreen instructions.
Installation disk for printers
Before connecting your computer, insert the installation CD if your USB printer has one. Then, after choosing USB001 or another USB port, install your printer by following the onscreen instructions. When the port and device configuration process is finished, the install disk's wizard will ask you to connect your printer. A proper identification prints after the printer setup is finished to show that the printer and computer are speaking to one another.
How to change Printer Port for Windows 10 and Windows 11?
Many people have complained that they need to replace their printer port. When the printer is down, you could be left scratching your head and wondering what to do. Fear not, as long as you carefully follow the directions and don't deviate unless you are sure of what you're doing, correcting this problem is quite simple.
If you're having an issue, you should follow these steps to change the printer port in Windows 10. Switching the printer port is indeed not difficult.
Step 1: Launch Devices & Printers
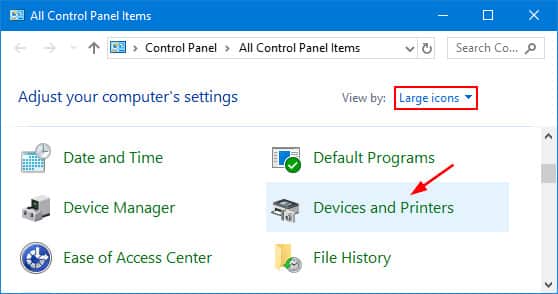
On Windows 10, you need to right-click the Start Menu button and choose Control Panel from the menu of choices to access this part. Once there, switch from subcategory to Small or Large icons in the View by section.
The next step is to select Devices & Printers, where, if your printer has well been installed on your computer, it can be found.
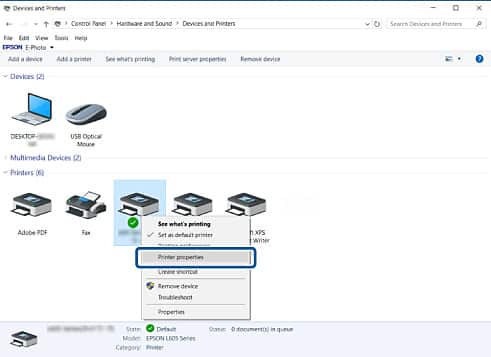
Step 2: Changing Printer Port
Right-click the printer once you've located it, then, from the menu that opens on your screen, choose Printer Properties. Right away, a window will appear with many tabs.
You should now select the Ports option from this menu. There should be a number of ports there that are made to function with a printer. Now, we must clarify that the COM connections are worthless if you're utilizing a USB printer.
Please keep that in mind when choosing a port for the cherished printer before choosing one for the LPT ports.
Step 3: Configure The Network Printer Option
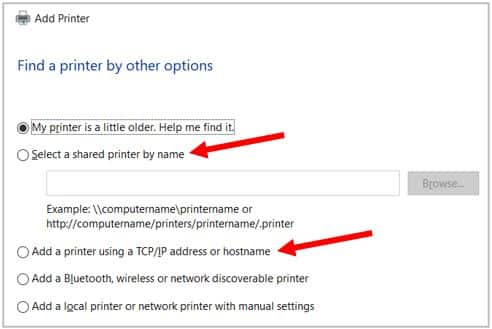
Networking is another topic we should be discussing right now. The network printer capability might be useful for small organizations and even private individuals. If you're interested in doing this, click Virtual Printer Port and then choose Add Port.
Select Standard TCP/IP Port out from the window that appears, then click New Port. Now that you should see a wizard, simply click Next.
Be careful to put the DNS server or perhaps an IP address you've already entered into the printer at the next area. After adding the item, select next, then await it for the printer to connect to the network.
Click Apply when the procedure is finished, and you're all set to go.
Note when changing Printer Port
- Do not alter the configuration if the printer does have a static IP address.
- Don't alter the configuration if the devices are set to utilize the network name rather than an IP address.
- Remove the printer from the Ethernet network before attaching a wirelessly interior solution port (ISP) to a printer that was previously set up for an Ethernet connection.
Conclusion
Overall, in order to print everything as quickly as possible, you can connect all of your wired and wireless printers, such as a picture printer, laser printer, and multifunction printer, to your computer by reading all our guidelines in detail above. Every printer has a port that can be used to connect to the computer, making it simple to locate the port for every printer if you need to repair it or the connection it has with your computer.
However, if your computer or laptop is the company's asset and using the internal system, we would like to suggest you call your IT department in case your printer port has issues or you change seating position and need to connect to another device.


