Connecting the CPU to a monitor is undoubtedly required to use and interact with your computer. And in the case of Gaming PC, a great monitor is not only a necessity but also a deterministic factor that defines and enhances your gaming experience. Here’s our instruction on how to connect a monitor and kickstart the adventure with your gaming PC!
1. Understand your PC monitors

Important features to look for in gaming monitors
As we’re talking about display, the first thing to have is the monitor. A monitor with suitable properties will take you to the heart and soul of the gaming experience. LCD and LED are two common types of monitor nowadays. There are hundreds of models with arrays of new technologies to choose from, and manufacturers are always in the race to release monitors with top-notch advancements that promise to take gamers' experience to the next level.
While you don’t need to know all the technical keywords, some features to look out for include screen size, resolution, refresh rate and response time. According to retailers, gamers often opt for monitors ranging from 24-inches to 27-inches, and larger screens come with higher price tags. For gaming, the ideal resolution is 2560×1440 px (WQHD) with a pixel density of ~109 pixels per inch. While more pixels offer a more realistic display, make sure that your CPU and GPU can handle optimal refresh rates and response time. Or else, you are likely to have motion blur and ghosting from your game.
Below are recommendations of optimal solution for different screen sizes:
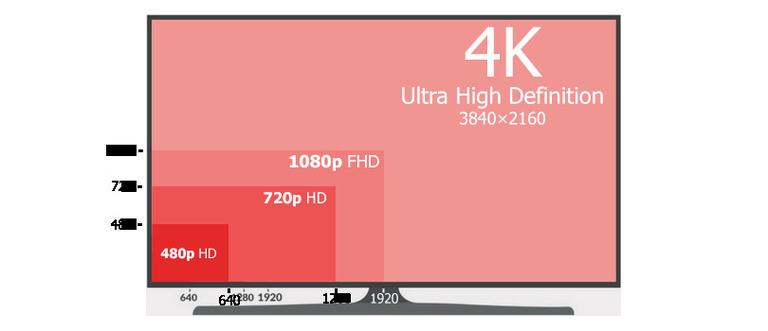
- 1080p Full HD (1080 x 1920 px) – 25” or smaller
- 1440p Wide Quad High Definition (2560 x 1440 px) – 27″ to 32″
- 4K (3840 x 2160 px) or 8K (7680 x 4320 px) Ultra High Definition – 32″ plus
Choose the right cable for connecting
Every gaming monitor requires at least two cables, one is for power supply and another to transfer data from your PC into image display. The latter is the one you need to connect with the computer. Brand new monitors should always have the cable included within purchase. There are several types of cable, for example, modern video ports can be either HDMI, DisplayPort, or USB-C. Older video ports are DVI, S-Video and VGA.


2. Steps to connect your gaming PC to monitor
Step 1: Get your space ready
Considering the importance of the monitor in your gaming space, dedicate a clean area with sufficient space for setup. Make sure that the space is lighted and ventilated properly with keyboards and accessories out of place so that the installation gets done easily and conveniently.
In case you replace an old monitor with a new one, make sure to get components of the old monitor detached from the gaming system. First shut down your PC, spare some time for the system to cool down and then detach all details of the old monitor from your system and unplug everything.
Step 2: Unbox the monitor

Step 3: Connect the cables
As you find the monitor, you are also likely to find its connector cable included. Match the cable with one of the video ports on the back of your monitor and gaming PC. Plug in the power cord to your monitor, then to the power socket.
Step 4: Turn on your computer
Once you got everything connected, turn on both the monitor and computer. After connecting to the power supply, the monitor will start within seconds and go on standby mode. You can check the power buttons on the sides or back of the monitor in case the little light on the corner does not show up. In case your monitor is turned on but returns no signal, unplug everything and retry the process.
If the previous steps are done correctly, the monitor will automatically display with the correct channel. Or else, you can manually get it done by changing the channels, which leads to the following step.
Step 5: Make/Adjust the Control Panel Settings
The best practice on setting up your display is to go ahead to the GPU control panel to make any adjustment that suits your own gaming preference.
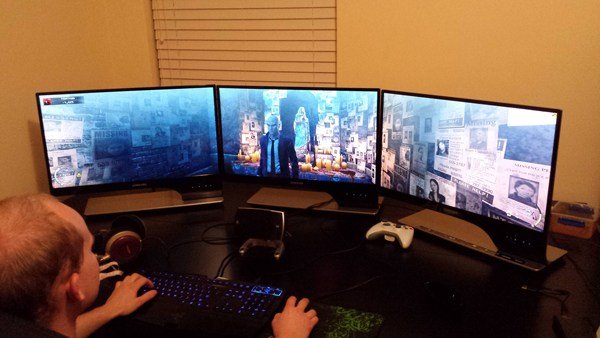
Tips on connecting your gaming PC to multiple monitors
Having more than one screen on your gaming set does not only look awesome but also promises to elevate your total experience. However, there are some issues you may bump into as a result of lacking information:
- Your favorite game(s) may not support multiple-screen setup.
- Your monitors are not compatible with each other and produce weird, unmatching displays.
- You waste a large amount of money on different monitors your GPU does not support.
Therefore, we have some notes for you to take before you take on the multiple-monitor approach:
- Try to get monitors of the same models: While there are no restrictions on what particular models to choose from, having identical monitors can save you time and brain cells on setting and maintenance. Also, to be functional, your monitors need to have the same, or at least not so considerably different, technical support.
- Check on your graphic cards: While most GPUs nowadays are designed to handle multiple monitors, you may want to look for separate graphic cards devoted to the purpose. You also need to make sure the card is in suitable type and comes with a required number of ports. For example, Those who want to use three 4K monitors will need a GPU with three separate HDMI ports, or mix one DisplayPort and two HDMIs.
- Look out for manufacturers’ support: BothNvidia and AMD offer their own exclusive control panels that support multiple monitors and make necessary adjustments. In case you’re new to the multiple monitor game, check out support pages of AMD or instructions from Nvidia for starter guidance.
Conclusion
As we have mentioned above, connecting monitors to gaming PCs is a rather uncomplicated process. However, little mistakes can lead to painful experiences with unnecessary complications, and potentially waste of money. We hope that this article equips you with useful tips and precautions to pick suitable monitors for your PC and start your gaming journey at ease.


